Have you ever wanted to connect your laptop to a larger monitor using an HDMI cable? Well, you’re in luck! In this article, we’re going to talk about how you can easily extend your laptop’s display to a monitor using an HDMI connection.
Connecting your laptop to a monitor via HDMI not only gives you a larger screen to work with, but it also allows you to enjoy high-quality visuals for gaming, watching movies, or even giving presentations. The process is quite simple and can be done in just a few easy steps.
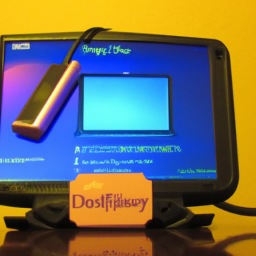
First, you’ll need to make sure that both your laptop and the monitor have HDMI ports. Most modern laptops and monitors have HDMI ports, so this should not be an issue. Once you have confirmed that both devices have the necessary ports, all you have to do is connect one end of the HDMI cable to your laptop and the other end to the monitor.
Once connected, you may need to adjust the display settings on your laptop to ensure that the monitor is recognized and functioning as an extended display. In most cases, this can be easily done by going to the display settings on your laptop and selecting the option to extend the display. This will allow you to use your laptop’s screen and the monitor as separate displays, giving you more screen real estate to work with.
In conclusion, extending your laptop’s display to a monitor using an HDMI connection is a simple and effective way to enhance your computing experience. Whether you need a larger screen for work, entertainment, or presentations, following these easy steps will allow you to enjoy the benefits of a dual-display setup. So, if you’re ready to take your laptop experience to the next level, keep reading our article to learn more about this convenient feature.
Understanding HDMI
What is HDMI?
HDMI, which stands for High-Definition Multimedia Interface, is a universal audio/video interface that allows the transmission of uncompressed high-definition video and digital audio signals between devices. It has become the standard connection method for TVs, monitors, projectors, and other display devices.
How does HDMI work?
HDMI works by transmitting digital signals, which results in superior audio and video quality compared to analog connections. It uses a single cable to transmit both audio and video signals, eliminating the need for multiple cables and simplifying the connection process. HDMI cables and ports are labeled with different versions, such as HDMI 1.4, HDMI 2.0, and HDMI 2.1, each offering different features and capabilities.
Benefits of HDMI
There are several benefits to using HDMI for connecting your laptop to a monitor:
-
High-quality audio and video: HDMI provides uncompressed, high-definition audio and video signals, delivering superior picture and sound quality compared to other connection methods.
-
Ease of use: HDMI cables and ports are widely available and easy to connect. They also support hot-plugging, which allows you to connect and disconnect devices without turning them off.
-
Versatility: HDMI is compatible with various devices, including laptops, gaming consoles, Blu-ray players, and more. It can transmit both standard and high-definition signals, making it a versatile and future-proof option.
-
Audio return channel: HDMI cables support bidirectional audio transmission, allowing the audio signal to be sent from the monitor back to the laptop or other audio devices.
-
Control and data transfer: HDMI cables can transmit control signals and data between devices, enabling features like automatic display adjustment and device synchronization.
Connecting Laptop to Monitor via HDMI
Check laptop and monitor compatibility
Before connecting your laptop to a monitor via HDMI, ensure that both devices have HDMI ports. Most modern laptops and monitors have HDMI ports, but it’s always better to double-check before proceeding. Check the specifications or user manuals of your laptop and monitor to confirm their compatibility.
Gather necessary cables and adapters
To connect your laptop to a monitor via HDMI, you will need an HDMI cable and potentially some adapters if your devices have different HDMI port sizes or if you need to connect to a different type of port. Ensure that you have the necessary cables and adapters before you begin the setup process.
Connect HDMI cable to laptop
- Locate the HDMI port on your laptop. It is usually labeled with the letters “HDMI” and might have the HDMI logo next to it.
- Insert one end of the HDMI cable into the HDMI port on your laptop. Make sure it is securely plugged in.
Connect HDMI cable to monitor
- Locate the HDMI port on your monitor. It is typically located on the back or side of the monitor and is labeled as “HDMI.”
- Insert the other end of the HDMI cable into the HDMI port on your monitor. Ensure that it is firmly connected.
Adjust display settings
Once you have connected the HDMI cable between your laptop and monitor, you may need to adjust the display settings on your laptop to ensure that it recognizes the external monitor. Follow these steps:
- Right-click on the desktop of your laptop and select “Display settings” from the context menu.
- In the display settings window, you should see two displays labeled as “1” and “2.” The number “1” represents your laptop’s built-in display, and the number “2” represents the external monitor connected via HDMI.
- Select display “2” and check the box that says “Extend the desktop to this display” to activate the extended display mode.
- You can also choose the relative position of the external monitor by dragging and dropping the displays in the arrangement section.
Troubleshooting common issues
If you encounter any issues during the setup process or while using the extended display, here are a few common troubleshooting steps to try:
- Check cable connections: Ensure that the HDMI cable is securely connected to both the laptop and the monitor. A loose connection can cause display issues.
- Restart devices: Try restarting both your laptop and the monitor to reset any temporary glitches.
- Check display settings: Double-check the display settings on your laptop to ensure that the extended display is properly configured.
- Update graphics drivers: Visit the manufacturer’s website and download the latest graphics drivers for your laptop. Outdated drivers can cause compatibility issues.
Using HDMI for Extended Display
Understanding extended display
Extended display, also known as dual monitor or multi-monitor setup, allows you to expand your desktop workspace by connecting an external monitor to your laptop. With extended display mode, you can display different content on each monitor or use them as a seamless extended screen.
Setting up extended display on Windows
To set up extended display on Windows, follow these steps:
- Connect your laptop to the external monitor via HDMI as described earlier.
- Right-click on the desktop and select “Display settings.”
- In the display settings window, you should see two displays labeled as “1” and “2.” Select display “2” and make sure the “Extend the desktop to this display” box is checked.
- Adjust the relative position of the external monitor by dragging and dropping the displays in the arrangement section.
- Click “Apply” to save the changes.
Setting up extended display on macOS
To set up extended display on macOS, follow these steps:
- Connect your laptop to the external monitor via HDMI as described earlier.
- Go to “System Preferences” by clicking on the Apple logo in the menu bar.
- In the System Preferences window, click on “Displays.”
- Click on the “Arrangement” tab.
- Check the box that says “Mirror Displays” to disable mirroring and enable the extended display mode.
- Adjust the relative position of the external monitor by dragging and dropping the displays in the arrangement section.
- Close the System Preferences window to apply the changes.
Adjusting extended display settings
After setting up the extended display, you can further customize the display settings according to your preferences. You can adjust the screen resolution, orientation, scale, and other display options in the respective display settings on your laptop.
Troubleshooting extended display issues
If you experience any issues while using the extended display, here are a few troubleshooting steps to consider:
- Check cable connections: Ensure that the HDMI cable is securely connected to both the laptop and the monitor.
- Restart devices: Try restarting both your laptop and the monitor to reset any temporary glitches.
- Check display settings: Double-check the display settings on your laptop to ensure that the extended display mode is properly configured.
- Update graphics drivers: Visit the manufacturer’s website and download the latest graphics drivers for your laptop.
- Test the monitor: If possible, connect the monitor to another device to determine if the issue is with the monitor or the laptop.
Benefits of Extending Laptop to a Monitor
Increased screen real estate
One of the primary benefits of extending your laptop to a monitor via HDMI is gaining additional screen real estate. With a larger monitor or dual monitors, you have more space to work with, allowing you to open multiple windows, documents, or applications side by side without cluttering your workspace.
Improved productivity
By extending your laptop to a monitor, you can significantly boost your productivity. The extra screen space allows you to have multiple applications visible simultaneously, making it easier to multitask, compare data, or reference information without constantly switching between windows.
Enhanced multitasking
With an extended display, multitasking becomes more efficient and seamless. You can have your primary task on one screen while keeping secondary tasks or references on the other. For example, you can work on a document on your laptop while monitoring emails or chat messages on the external monitor.
Better gaming experience
If you enjoy gaming on your laptop, extending it to a larger monitor can greatly enhance your gaming experience. The larger screen size and better image quality provided by the monitor make gaming more immersive and visually appealing.
Presenting and sharing content
Connecting your laptop to a monitor via HDMI is also beneficial when it comes to presenting or sharing content. Whether you’re giving a presentation, collaborating with colleagues, or simply sharing videos or photos with friends, a larger monitor ensures that everyone can easily view and understand the content.
Alternative Methods to Extend Laptop Display
Using VGA or DVI cables
Apart from HDMI, VGA (Video Graphics Array) and DVI (Digital Visual Interface) cables are also commonly used to connect laptops to monitors. These cables transmit analog signals and are often found on older laptops and monitors. However, VGA and DVI cables may not support high-definition video or audio, so HDMI is generally preferred for optimal quality.
Wireless display options
In addition to wired methods, there are wireless display options available for extending your laptop to a monitor. Technologies like Miracast and Apple AirPlay allow you to wirelessly mirror or extend your laptop’s display to a compatible monitor or smart TV, eliminating the need for physical cables.
Using docking stations or port replicators
Docking stations or port replicators are accessories that allow you to connect multiple devices, including monitors, to your laptop using a single cable. These devices often provide a variety of ports, such as HDMI, DisplayPort, USB, and Ethernet, making it easy to extend your laptop’s display to multiple monitors or connect other peripherals.
Connecting through USB
Some laptops and monitors support USB-based display connections. With USB display adapters, you can connect an external monitor to your laptop using a USB port. These adapters convert the USB signal into a video signal compatible with the monitor, enabling extended display functionality.
Considerations for Optimal HDMI Setup
Supporting hardware specifications
To ensure optimal performance when connecting your laptop to a monitor via HDMI, check the hardware specifications of both devices. Verify that your laptop’s graphics card or integrated graphics supports HDMI output, and ensure that your monitor supports HDMI input. Additionally, confirm that both devices are capable of the desired resolution and refresh rate.
Choosing the right HDMI cable
When selecting an HDMI cable, consider the versions and features it supports. Higher versions, such as HDMI 2.0 or HDMI 2.1, provide increased bandwidth for higher resolutions and refresh rates. Thicker cables with better shielding can also reduce signal loss and interference over longer distances. However, for most standard setups, a basic HDMI cable will suffice.
Understanding maximum resolutions
Different HDMI versions support different maximum resolutions and refresh rates. Verify the maximum resolution and refresh rate supported by your laptop’s graphics card or integrated graphics, as well as your monitor. Ensure that both devices are capable of the desired resolution and refresh rate for optimal display quality.
Dual-monitor support
Not all laptops can support dual-monitor setups via HDMI. Check your laptop’s specifications or consult the manufacturer’s documentation to determine if it supports multiple displays. Integrated graphics or dedicated graphics cards with multiple display outputs are typically required for extended display functionality.
Audio considerations
When extending your laptop to a monitor via HDMI, audio is usually transmitted alongside the video signal. However, ensure that your laptop’s audio output is set to the HDMI device to hear the audio through the monitor’s speakers. You may need to adjust the audio settings on your laptop to ensure audio is directed to the HDMI output.
Maintaining HDMI Connection
Proper cable handling
To maintain a reliable HDMI connection, handle the cable carefully to avoid any physical damage. Avoid bending the cable excessively or sharply. When unplugging the cable, gently pull it straight out from the HDMI port to prevent any strain on the connectors.
Avoiding cable damage
Protect your HDMI cable from damage by keeping it away from sharp edges, heavy objects, or areas with high traffic. Avoid stepping on or tugging the cable, as this can lead to signal degradation or complete cable failure.
Secure connections
Ensure that both ends of the HDMI cable are securely plugged into the laptop and the monitor. Loose connections can result in intermittent video or audio issues. Occasionally, check the connections to make sure they haven’t come loose due to movement or vibrations.
Updating drivers and firmware
Regularly update the graphics drivers and firmware of your laptop and monitor. Manufacturers often release updates that improve compatibility, address performance issues, and enhance the overall HDMI experience. Check the manufacturer’s website or use automatic update tools to ensure you are using the latest software versions.
Troubleshooting HDMI Connection Issues
No signal on the monitor
If you’re not getting a signal on the monitor after connecting your laptop via HDMI, consider the following steps:
- Ensure that the HDMI cable is securely connected to both the laptop and the monitor.
- Verify that the monitor is powered on and set to the correct input source.
- Check your laptop’s display settings to ensure that the extended display mode or external monitor is enabled.
- Try a different HDMI cable or test the monitor with another device to rule out any hardware issues.
Incorrect display or resolution
If the display on the monitor appears distorted or the resolution is not correct, try the following solutions:
- Adjust the display settings on your laptop to match the native resolution of the monitor.
- Update the graphics drivers on your laptop to ensure compatibility and optimal performance.
- Confirm that your laptop’s graphics card or integrated graphics supports the desired resolution.
Audio not working
If you’re not getting any sound from the monitor’s speakers, try these troubleshooting steps:
- Ensure that the audio on your laptop is set to output through the HDMI device.
- Test the monitor’s audio by connecting it to another device via HDMI to determine if the issue is with the monitor or the laptop.
- Update the audio drivers on your laptop to ensure compatibility and proper functionality.
Intermittent connection problems
If the HDMI connection is unstable or frequently disconnecting, consider the following solutions:
- Check that the HDMI cable is securely connected to both the laptop and the monitor.
- Ensure there are no physical obstructions or loose connections that could affect the signal.
- Try a different HDMI cable or test the monitor with another device to rule out any hardware issues.
- Update the graphics drivers on your laptop and the firmware on your monitor to address any compatibility or performance issues.
Updating graphics drivers
If you’re encountering issues with your HDMI connection, updating the graphics drivers on your laptop is often a good first step. Follow these general steps:
- Identify the manufacturer and model of your laptop’s graphics card or integrated graphics.
- Visit the manufacturer’s website and navigate to the support or downloads section.
- Find the latest graphics driver for your specific model and operating system.
- Download and install the driver, following any provided instructions.
- Restart your laptop to apply the changes and test the HDMI connection again.
Upgrading Laptop Graphics for HDMI Support
Checking laptop graphics capabilities
Before upgrading the graphics on your laptop, determine the existing capabilities of your graphics card or integrated graphics. Check the manufacturer’s specifications or use system information tools to identify the model and features of your current graphics hardware.
Upgrading integrated graphics
For laptops with integrated graphics, upgrading the graphics capabilities can be challenging. In most cases, integrated graphics are soldered directly onto the laptop’s motherboard, making them non-upgradable. However, some laptops have modular components that allow for graphics upgrades, but these are rare and usually found in high-end gaming laptops.
Installing dedicated graphics card
If your laptop supports dedicated graphics and you want to upgrade for better HDMI support or improved gaming performance, you may be able to install a dedicated graphics card. However, this process varies depending on the laptop model, and some laptops do not have the necessary space or connectors to accommodate a dedicated graphics card.
Requirements for graphics card upgrade
Before attempting to upgrade your laptop’s graphics with a dedicated graphics card, ensure that your laptop meets the following requirements:
- Compatibility: Verify that your laptop’s motherboard, BIOS, and power supply can support a dedicated graphics card. Consult the laptop’s documentation or contact the manufacturer for compatibility information.
- Physical space: Check if your laptop has enough physical space to accommodate a dedicated graphics card. Measure the available space inside your laptop and compare it with the dimensions of the graphics card you intend to install.
- Power supply: Determine if your laptop’s power supply can handle the additional power requirements of a dedicated graphics card. Upgrading the power supply may be necessary to avoid system instability or insufficient power delivery.
Conclusion
In conclusion, extending your laptop to a monitor via HDMI offers numerous benefits, including increased screen real estate, improved productivity, enhanced multitasking, a better gaming experience, and the ability to present and share content. By following the outlined steps, you can easily set up and troubleshoot your HDMI connection. Additionally, alternative methods such as using VGA or DVI cables, wireless display options, docking stations, or USB-based connections can provide additional flexibility. However, attention to hardware specifications, choosing the right HDMI cable, and considering audio elements are crucial for optimal performance. By maintaining your HDMI connection and addressing any troubleshooting issues, you can fully enjoy the advantages of extending your laptop to a monitor via HDMI and expand your laptop’s functionality.


